Where: Platform → Agents page → + New agent.From gap analysis, click any requirement card on the Verification page and hit Launch agent — same chat, pre-scoped to that requirement.
Launch an agent
New Agent opens a chat with Seb. Describe the task in plain language; Seb plans and proposes a prompt; tweak and launch.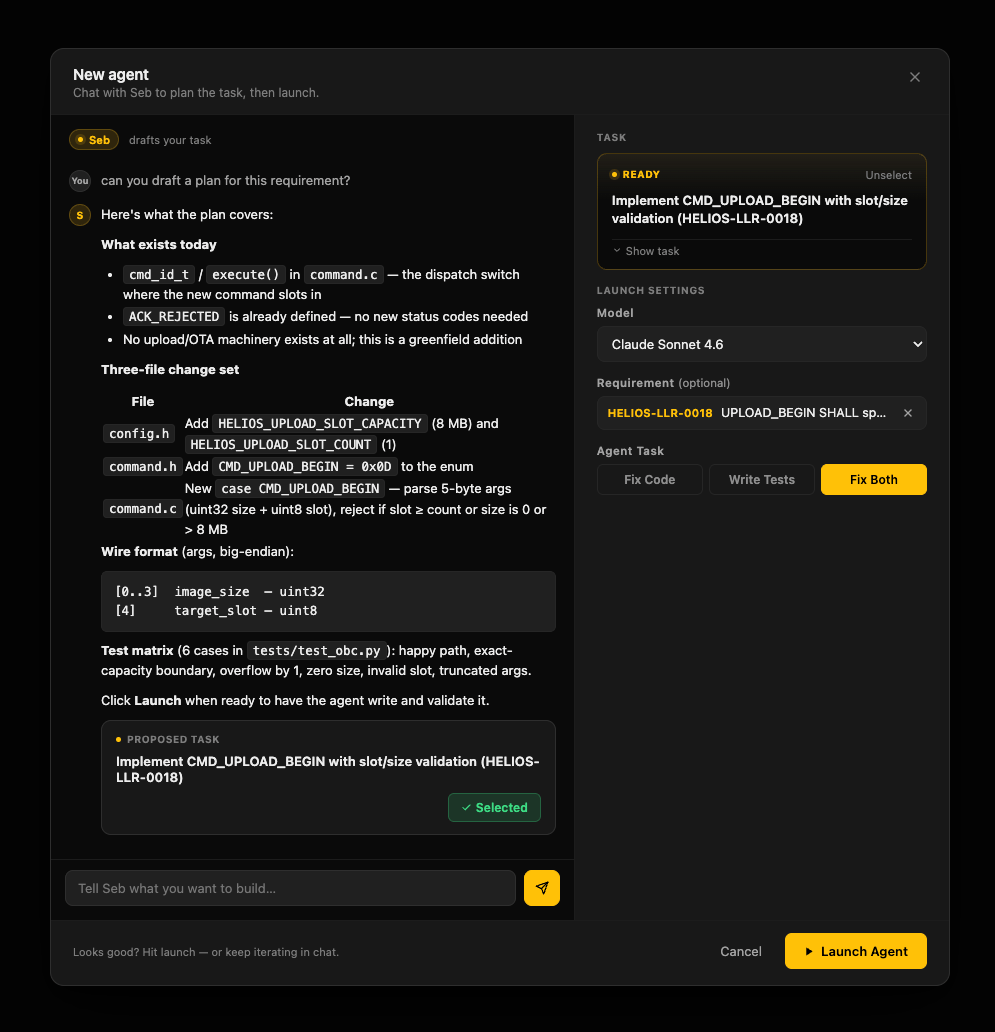
- Describe the task. “Add CAN error-frame handling to the motor controller.” “Refactor
motor_initto use the new HAL.” - (Optional) Mention a Jira or Linear ticket. With the project linked to Jira or Linear, type the identifier —
KAN-42,ROO-1163— anywhere in your message. Seb pulls in the ticket’s title and description as context and tags the launch with it. - (Optional) Queue behind an existing job. Schedule an agent to automatically launch after a current job finishes. The agent will continue working directly on the branch.
- Pick a model. Defaults to your global default from Profile → Model.
- Launch. The job appears in In Progress.
Where tests happen
The agent runs your test bench procedures as part of its loop:- Software-only procedures — anything that doesn’t touch hardware runs on the agent’s cloud machine. No setup needed.
- Hardware procedures — launched agents can reach and share your hardware to run tests and debug automatically during implementation. See Test benches for setup.
Agent life cycle
Three sections on the Agents page:- In Progress — queued, running, blocked on a dependency.
- In Review — Seb has produced a PR. The detail view shows the summary, files changed, PR link, Send back with feedback (iterate), Complete (accept), Dismiss (reject).
- History — done, dismissed, failed, or cancelled.